Even if you buy the most expensive fish house, some components may break after a few years, when that brand of tank is no longer in production. It is for this reason that it can be difficult to replace glass, lids, partitions or other parts of aquariums, especially if they have a complex shape. But don’t despair - just a little imagination and a couple of attempts, and you can make any aquarium lid with your own hands.
Cover functions
Closing the aquarium is necessary, and in some cases vital.
Functions of aquarium cover:
- Slowing down evaporation processes. A sharp decrease in the volume of water (especially in hot weather) contributes to the thickening of the liquid - an increase in the content of organic substances. This is explained by the composition of water - it has the form of a solution, which becomes more concentrated as it evaporates.
- Protection from dust, dirt, falling objects.
- Effectively maintaining the correct temperature.
- Protecting fish from jumping out, threatening death from falling or suffocation without water.
- Fastening for devices - a lamp is especially often mounted in the upper part. It remains hidden from view, which improves the overall appearance and provides soft diffused light, which is most favorable for the inhabitants of the aquarium.
Therefore, it is imperative to close the tank. You need to use only solid materials - mesh will not work.
For which fish is it required?
The risk group includes jumping fish and species that breathe atmospheric air - they often jump to the surface and can accidentally fall out if the water level in the container is not set correctly.
Types of fish that can be harmed in an open aquarium:
- Malpulutta Kretsena;
- black macropod;
- zebrafish;
- barbs;
- high-finned (flag) platie;
- Neon Aplocheilichthys;
- tetra-congo;
- neons;
- betta fish (Siamese betta);
- mechensotsy.
Fish may try to escape from the tank not only because of natural instincts (jumping high above the surface). There are many reasons why fish jump out. The most common include stress, poor water quality, trying to escape a predatory neighbor, improper lighting, or running the filter or aerator too hard.
Purpose
Aquarium lids serve not only as decorative items. They perform a number of useful functions, without which it is difficult to provide underwater inhabitants with the necessary conditions:
- Significantly reduce the rate of liquid evaporation. The period between top-ups increases.
- They serve as a reliable protective barrier against foreign objects entering the tank.
- Protects against pets, especially curious cat paws. Relevant for houses where parrots, cats, and dogs are kept.
- They are supplemented with the necessary elements, including lighting fixtures, accessories for a filter and an aerator.
- They prevent fish from accidentally jumping out of the aquarium, keeping them alive.
- Allows you to maintain the desired temperature.
Thus, the lid helps maintain the established balance of the ecosystem and increases the safety of the inhabitants of the aquarium.
Which material to choose
PVC sheet
Most often, a do-it-yourself aquarium lid is made from PVC. This material is inexpensive - scraps of it can be bought for next to nothing from advertising companies that make billboards and posters.
Advantages of the material:
- light weight;
- high strength;
- ease of processing;
- low price.
There is only one minus - for large tanks the lids will have to be reinforced with ribs, because the material will bend in the middle. The plastic lid is not reliable.
Wall panels
There are several thickness standards (100, 200 and 370 millimeters), so you can choose a sheet for a specific application and use it without modification.
Design advantages:
- low cost;
- ease of processing;
- availability of purchase - available in all construction stores;
- various colors.
There are also disadvantages.
The most significant of them:
- low strength - reinforcements must be horizontal and vertical;
- The panel is easy to break, so even small objects should not be allowed to fall.
These panels are considered one of the least popular materials.
Laminate, lining, plywood, chipboard
All these materials contain wood or its particles, therefore they are combined into one group.
Pros:
- easy product assembly;
- high hardness and strength.
There are more disadvantages, but they do not always limit the use of raw materials.
Minuses:
- low moisture resistance;
- price is above average;
- heavy weight.
All these materials are varnished or impregnated on the inside to protect them from moisture.
Plexiglas
Very unusual, even designer material.
Advantages:
- original look;
- high strength.
The disadvantage is the complexity of the work. Plexiglas can only be bent using a blowtorch or a special hair dryer, and the glue is prepared exclusively on the basis of trichloroethane. It is equally difficult to arrange lamps and equipment in such a way as to maintain the aesthetics of the entire structure.
Glass
The most expensive option for making a lid for an aquarium.
There are advantages, but they are not significant:
- does not become cloudy (unlike plexiglass);
- no need to paint with varnish.
The disadvantages are very “serious”.
Main disadvantages:
- very heavy weight;
- fragility;
- difficulty of working with the material.
Due to its disadvantages, glass is used the least often.
End caps
It remains to close two ends. To do this, check their width on each side of the aquarium.
Please note that sometimes these sizes may differ by a couple of millimeters. Therefore, you need to measure on both sides, and not make them the same initially.
Measure rectangular blanks on PVC plastic and cut them to these dimensions. Next, use a knife to cut off all the partitions made of PVC plastic along the edges. Something like this.
The side walls should seem to fit into the lid itself and only then stick to it.
For rigidity, we again use plastic corners.
We seal all joints with glue and sealant. The finished lid design will look like this from the inside and outside.
To create a more attractive look, paint it in dark colors.
Or cover it with dark decorative film. It will look completely different.
It is better to apply the paint in several layers, otherwise the PVC panel may show through when the lights are turned on.
Manufacturing process
First you need to measure the dimensions of the tank to determine the size of the product. If you have the makings of an engineer, you can even make a simple drawing. It is necessary to consider the convenience of the design, the possibility of its easy removal for cleaning the fish house and installing new decorations.
Required Tools
You need to prepare everything you need in advance so as not to be distracted while working.
You will need:
- For notes – pencil or marker, ruler, square.
- Cutting tools – knife, scissors, jigsaw, glass cutter, cutter.
- Screwdriver or drill.
- Substances for adhesion - glue, a sealant gun, the sealant itself, solder for glass.
It is equally important to find a perfectly flat surface to work on (this is especially true for plexiglass).
Selection of materials
From the above materials it is easy to choose the most suitable one.
Important selection criteria:
- tank size;
- quantity of equipment;
- the height of the lid - for some fish it must be significant in order to maintain a large layer of air;
- work skill and ease of manufacture;
- availability and price of material;
- ease of use;
- aesthetics.
Most experienced aquarists prefer to use PVC lids, wall panels, laminate, varnished plywood and chipboard for the manufacturing process.
For a panoramic aquarium
The main difficulty in this case is the curved front wall. There are two options to get around this problem - make a curved frame or a frame with convex platforms. Let's consider production in both cases.
Product with a bent frame - step-by-step instructions:
- The material you can use is plywood, lining, plastic or laminate.
- It is necessary to cut out the main parts: the top convex, back and sides.
- Bend the front part by heating the plastic or plexiglass with a hairdryer. For wood, you need to make transverse cuts with a grinder, with a depth of at least half the thickness of the workpiece. The greater the curvature, the smaller the gaps between cuts should be.
- Glue the strip and sides to the lid, having previously degreased it. Secure the corners and support bolts at a distance of three centimeters above the bottom edge.
- Make a hatch for feeding, process the edges.
- Cover the black material with foil or other reflective covering.
- Install lamps, aerator and other equipment.
The manufacturing process is not simple and is unlikely to be suitable for a novice aquarist. Let's consider the following, easier option.
Cover with platforms:
- Any material can be used.
- Cut out rectangular blanks, which will serve as the base.
- Secure the sides with glue or screws.
- Attach pre-cut platforms of the desired curvature.
- Make holes for feeding and wires.
- Mark and hang lamps and equipment.
- Paint or tape the lid.
Remember that you need to connect the equipment only when the product is completely ready.
For round tank
In this case, there are also two options: double-layer lids and with a side.
Rules for making a two-layer variation:
- Any materials can be used.
- Measure the hole of the flask, cut out two circles - the first is the same diameter, the second is 3-4 centimeters larger.
- Glue both parts, attach the handle, cut holes for the ventilation wires and wires.
The second option will require skill in working with plastic. Sometimes you can't do without an assistant.
Lid with side - step-by-step instructions:
- Cut a circle 1-2 centimeters larger than the aquarium flask, cut holes in it and attach a handle.
- Make a rectangular strip equal to the circumference. The most difficult thing in this case is to bend the material, giving it a perfectly round shape.
- Glue all the received parts, decorate the lid and install the equipment.
The first option is easier to manufacture, the second is more aesthetically pleasing and looks “expensive”, just like a purchased product.
How to make a lid with a filter
Sometimes the filter needs to be installed not on the side, but on the top. This arrangement should be taken into account when manufacturing the protective cover.
Sequence of actions:
- Cut out the lid parts and assemble the structure.
- Drill a hole in the lid for a special size mount for a specific filter. Place the filter on a special platform, which can be made from a small square sheet.
- Check if the device is installed correctly. If the tank is large, it is necessary to make a separate hatch for cleaning the filter.
It is advisable to provide for the installation of the filter before purchasing it.
Price issue
The cost depends greatly on the type of material.
Here are rough estimates for a panoramic container with dimensions of 60x30 cm and a lid height of 10 cm:
- PVC - 1500-2000 rubles per sheet, 100 rubles for glue, paint and film for gluing. Total – 2000-2200 rubles.
- Plastic panels. Four parts 10 by 300 centimeters, glue and decor - a total of about 600 rubles.
- Laminate - three boards of 130 cm - 600 rubles. The same amount is needed for sealant and liquid nails. The result is at least 1200 rubles.
- Lining. A sheet along with wood varnish, liquid nails and sealant will cost 1000 rubles.
- Plywood will cost a little more - 1200-1300 rubles.
- Plexiglas and glue are inexpensive. This “pleasure” will cost only 500 rubles.
- Glass (one sheet) and glue cost about 600 rubles.
For a round aquarium with a diameter of 30 centimeters, everything will cost the same. For a panoramic tank with dimensions of 80x53 cm, the above cost must be multiplied by a coefficient equal to 1.5-1.6.
Preparing for work
Making your own lid is easy. The main thing is to choose the right material, calculate its quantity and dimensions of the finished product so that it sits tightly on the container and can withstand the load.
You will first need to take measurements, accurately taking the parameters of each wall, as well as the desired height. In order not to get confused in the future, it is better to make a drawing, which will indicate in detail and clearly which segment will go where.
Also important is the form itself. She can be anything. If this is a lid for a corner aquarium, then, accordingly, you need to calculate how it will sit. But even for a standard rectangular container you need to think through everything carefully, namely:
- How the walls will contact the glass;
- Are ventilation holes necessary?
- Will there be a need for doors through which access to the aquarium will be simplified for feeding, care, etc.;
- Where the holes for the filter, compressor and other equipment will be located.
In addition, for manufacturing you will need certain accessories and tools:
- Roulette;
- Pencil;
- Stationery knife;
- The material itself (PVC, laminate);
- Corners;
- Glue (optionally, liquid nails).
We recommend reading the article: How to make an aquarium with your own hands
How to make a backlight
To illuminate aquariums, it is recommended to use LEDs or fluorescent lamps. They can be combined to create soft natural light. If you use diffuse LEDs, you can create a muted moonlight effect.
The lamps must be located at least six centimeters above the water level.
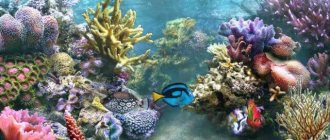
The level of light depends greatly on the inhabitants of the tank, especially plants. For example, two lamps are enough for Riccia and its cichlid neighbors. Light-loving species require a minimum of four lamps.
You can determine the lighting temperature yourself by adjusting the number and type of lamps. If you don’t want to experiment, you can buy ready-made lamps of a certain spectrum and light temperature.
How to attach a lamp
When working with the cover, it is recommended to attach the ballast and lamp mounts immediately after assembling the product. All components must be glued to the ceiling, then each lamp must be connected to its ballast. The LEDs are installed in mounts and attached using tape or hot-melt adhesive.
The LEDs must be connected according to the diagram, output in a single line through the power supply. The line voltage is 12 Volts. After installation, you need to connect the system to the control unit or switch, making a long cord - “with reserve”. Under no circumstances should the wires be subjected to strong tension.
Installation and connection of lighting lamps
Let's move on to lighting installation. First we will do it using ordinary LED light bulbs.
To turn the backlight on and off, you will need two switches. Don’t take bulky indoor two-keyboards; small “buttons” look much more beautiful.
The current in the circuit will be insignificant, so they will withstand such a small load.
The bulbs should be placed evenly over the area - some along the edges of the lid, the rest in the center. The outer ones will be turned on from one button, the central ones from the other.
Ceramic sockets will be needed for each light bulb. How to attach them to the lid? The best option here is clips for plastic pipes. For E27 cartridges they will fit 32mm.
The clip itself also needs to be screwed to the inner wall of the lid. If you used a single PVC panel rather than a double panel, you will have to make square platforms. Otherwise, the screw will pierce the wall.
Cut out square blanks from the same PVC plastic as the lid, and glue them to the inside, where the light bulbs will be.
Next, screw the clips into these places using small screws.
Insert a ShVVP wire 2*0.5 into each cartridge. Read how to properly connect a light bulb socket in a separate article.
The outer sockets are connected with one wire, the central ones with another. To ensure that the conductors remain intact when connecting several light bulbs, do not cut their copper strands, but simply remove the outer insulation and place a ring under the screw.
This parallel connection of several light bulbs in a row is widely used in the manufacture of makeup mirrors.
Cartridges with charged wires are inserted into the clip holder and stay there perfectly.
When connecting wires to the switch, do not forget that it is the phase conductors that must break through it. Zero goes directly to the paws, without the participation of a switch.
Small holes are cut out for the microswitches in a convenient place on the cover, where they are glued.
By connecting all ends, check the functionality of the backlight. To prevent the wires from hanging or dangling, glue them to the outside of the cover.
They can also be hidden in a separate box or cable channel.
Place the lid on the top of the aquarium and turn on the light. Don't forget to cut holes in the plastic for cables and hoses.
Selecting a finished lid
Most popular in Russia. The range of products is very wide, but there are no models of complex shapes. The color range of components is rich; you can even purchase lids with imitation of natural wood (alder, oak, cherry, walnut and other species). Prices start from 1900 rubles.
Panoramic covers are manufactured by the Aquael brand. The price for the cheapest lid size 50×30 already starts at 2300 rubles. Naturally, in this case, a homemade aquarium lid will cost several times less.
Criteria
To choose a reliable aquarium accessory, you need to evaluate a number of parameters.
The most important of them:
- ergonomics;
- effectiveness of protection;
- ease of use;
- the volume at the top to accommodate all the equipment;
- appearance;
- price.
Having comprehensively assessed all these criteria, you definitely won’t go wrong with your choice.
Popular manufacturing companies
Ready-made aquarium covers are produced by many domestic and foreign manufacturers of aquarium equipment. Among them, the most famous are:
- , which produces options for rectangular and panoramic aquariums of various sizes. They can be black, gray, with the texture of wood of different species.
- produces simple budget designs, which are guaranteed for 5 years.
- Well-known has established the production of lids of any complexity according to the customer’s individual project.
- Aquael offers aquarists rectangular and curved models, equipped with all the necessary accessories. Such designs solve issues of life support for aquatic inhabitants. They are priced accordingly.
- Reliable equipment for aquariums is produced by JUWEL. The company produces products for aquariums of any size.
You can purchase the finished product at a pet store or order it online. First you need to measure the dimensions of your home pond.
Aquarium lighting diagram with fluorescent and LED tubes
The second lighting option is to make the same lid, but instead of cartridges, attach holders for T4, T5, T8 fluorescent tubes inside.
Connect them in parallel with each other, and lead the wires to the starters. It is most convenient to connect lamps at the end through special waterproof caps.
The connection diagram will depend on your electronic ballast. Look and check it on the device body.
Fluorescent lighting implies the presence of special chokes or starters. These are such heavy rectangular boxes. The power wires first go into them, and only then disperse through the lamps.
Mount these triggers on the side or back of the lid so that it is not visible to others and does not detract from the appearance of the aquarium.
You can find completely sealed blocks that are not afraid of damp places, and place them from the inside. But again, the connection points of the conductors will have to be reliably sealed with some kind of adhesive.
The wiring diagram for an aquarium lighting with four fluorescent lamps will look like this.
Do not forget that you need to connect the lighting in the aquarium through a differential circuit breaker or RCD in order to protect yourself and your pets in case of an unexpected current leak.
If you are afraid of a large number of wires, then it is better to install not bare T-8, T-5 tubes, but LPO lamps ready for them with built-in electronic ballasts.
For each such lamp you will need to install only one cable. Four tubes - four cables.
They also sell special jumpers for them.
By using them, you will generally have only two cables coming from the push-button switches, and no cobwebs from a bunch of wires.
Instead of obsolete fluorescent tubes, it is better to use LED ones. In this case, you just need to connect the phase and zero on each side of such a tube.
Old type LB lamps can be very easily converted to LED ones. Read more about this in a separate article.
Combined lighting can be made for small tubes. Fix the tubes in the middle of the lid, and install two LED bulbs at the edges.
You cut two hatches on the canopies for the light bulbs. When the hatches are opened, the bulbs will come out.
Fluorescent lighting can be connected to one switch, and an LED to another.
But do not overdo it with the number of lamps and the brightness of the backlight.
Aquarium lighting with LED strip
The third lighting option is a moisture-resistant LED strip with a degree of protection IP65.
There is no need for cartridges, T-8, T-5 tubes, or chokes, but you will need a 12V power supply.
Sealed, waterproof power supplies are mounted both outside and inside the cover. Look at the dimensions of the aquarium.
A voltage of 220V is supplied to the block, and the 12V output through two conductors (“+” and “-“) goes to the contact pads of the tape.
Soldering points are sealed with hot-melt adhesive.
Read about all the nuances and connection diagrams for LED strip in separate articles.
What is good about LED strip? Firstly, low voltage. Secondly, if absolutely necessary, such lighting can be connected even from batteries, without an outlet, without 220V voltage and unnecessary wires.
At the same time, it works great on high-capacity 18650 batteries for quite a long time.
Please note that you cannot simply stick a powerful LED strip onto the surface of the lid. Otherwise, it will serve you for a couple of months and will burn out from overheating.
Special aluminum profiles are produced for such tapes. They play the role of a cooling radiator.
You attach such a profile to the lid (using small screws or hot glue), and then glue the backlight to it. In this form, the LED strip will last its entire warranty period.
By the way, a life hack for those who want to increase the backlight intensity without significant costs. Typically, an LED strip is glued in a straight line onto a flat surface and thus the stated number of lumens is obtained from it.
But you can do it a little differently. Take a plastic tube and wrap the tape around it in a spiral.
As you understand, for the same length of the cover, in this case you will use much more backlight, which means its brightness will increase.
The tube itself is attached to the lid using clips. In the presence of a reflective substrate, quite bright illumination comes out.
If possible, instead of a plastic tube, you can choose an aluminum one. This will significantly improve heat dissipation from heated diodes and increase their service life.