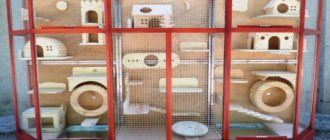
High-quality cages for rabbits are sold ready-made. But if desired, you can make the structure according to individual drawings. We figure out what size the cage should be, where it is best to place it, how to make a frame, floor, walls, roof. Read to the end and you will have an accurate idea of how to quickly and correctly build a rabbitry.
DIY rabbitry Source fermer.ru
Recommendations for placing a rabbitry
It is important not only to understand how to make a rabbit cage, but also to know where to place it. When choosing a place on the street where the rabbitry will be installed, you need to consider several important factors:
- Rabbits are distinguished by increased sensitivity to drafts. Therefore, the place should be chosen such that the rabbit’s house is out of reach of the winds.
- However, greenhouse conditions are not suitable either. An important point in keeping any pets, including rabbits, is high-quality ventilation. If this condition is not met, pathogenic organisms in the feces will begin to actively multiply and negatively affect the condition of the rabbits.
- The location should be dry, away from bodies of water. This is due to the fact that the upper limit of moisture tolerated by these animals is 75%. An indicator higher is fraught with consequences - pets will begin to sneeze and get sick.
- Homemade rabbit cages should be installed in the shade under trees. Avoid direct exposure to sunlight.
- During the winter cold, the rabbit's house is insulated. The temperature inside the cells must be maintained constant. It is not allowed to decrease below +10 degrees. The upper temperature is +20 degrees.
The rabbitry is installed in the shade, direct sunlight is excluded Source fermok.ru
Cold climatic conditions require the location of the rabbitry in a special barn or other building. Which also has a number of specific requirements.
- The windows of the shed should face south or southeast. This way the animals will be able to receive enough light and warming sunlight.
- It is important that additional lamps and heaters are installed in the room so that in winter the animals avoid a lack of heat and light.
- The walls must be plastered. This will prevent excess moisture from penetrating into the room itself.
- A constant supply of air is ensured to the cells.
When arranging the cells, it is necessary to take into account that they must be located from the ground at a certain height. This saves you from rodent attacks.
Hut for fawning
In such a house, chambers for queen cells are usually placed on the side. The walls must be solid so that there is no draft. If the enclosure will be placed indoors, then you need to choose a place without ventilation. When the house is placed on the street, it must be insulated.
The queen cell should be made removable so that, if necessary, it can be moved to another enclosure. The camera must be kept dry at all times. It is necessary to periodically lay fresh hay in it. You should not use sawdust for bedding, as small parts of it can get into the rabbits' noses.
When the female brings her babies in winter, you need to put a heating pad with warm water in the queen cell. You can also use a regular incandescent lamp for heating. It must be on all the time. With such heating, you need to take care of fire safety.
Some breeders lay a cable from the “warm floor” system in the queen cell. The cable must be placed intact in the enclosure; there should be no solders on it. Using this method, you can regulate the temperature in the box yourself.
What materials will you need?
When planning to make a cage for rabbits, you should prepare certain tools and materials. Wood and metal mesh are the priority. The first of these materials requires mandatory treatment with antiseptics.
Tools and materials for building a rabbitry Source kartoska.ru
Materials:
- edged board;
- wooden blocks;
- plywood;
- mesh with small cells;
- medium diameter metal wire;
- plastic pallets.
Important! It is unacceptable to use chipboard instead of plywood, because the latter is characterized by high moisture absorption, as a result of which it quickly becomes unusable.
Tools:
- hacksaw;
- screwdriver;
- hammer;
- pliers;
- plane;
- corner.
The roof of the cage is covered with slate.
Preparation
You can build cages for rabbits with your own hands. It's quite simple. Initially, you need to decide on the type of enclosure and make a drawing. Next, you will need to purchase materials and prepare tools. A homemade house can be made from scrap materials.
You can make your own cages from metal profiles or wood. For rabbit breeding, the most popular enclosures are wooden. There may be external cages for rabbits, as well as for rabbits that will live in the house.
The most popular are bunk cages for rabbits. They can be used simultaneously to keep adults of different sexes. You can also keep young animals in the same house. This will help save space in the room.
Cage sizes for rabbits, drawings
The size of rabbit cages depends on the breed of pet. Larger individuals, therefore, need more space. Standard building dimensions:
- cage height for rabbits – 50-70 cm;
- width – 70-80 cm;
- length – 120-170 cm.
Important! If there is a need to change the size of the building, then the length indicator increases. The height and width are not touched, they are standard.
The roof of the rabbitry can be sloped backwards. Then the height of the rear part will have to be reduced by 5-10 cm.
Roof of a rabbitry with a slope Source sait-pro-dachu.ru
See also: Catalog of companies that specialize in the design and installation of small architectural forms
Only individuals of the same sex can be located in one pen. Mixing animals of different sexes is prohibited due to certain circumstances. In particular, the following:
- high probability of uncontrolled cases;
- Pregnancy in females will be difficult to track;
- there is a high risk of males fighting for the attention of females and vice versa;
- warring females can kill each other's offspring.
It is wise to start by drawing up a drawing of the planned building. According to the proposed drawing, you can build wooden cages for rabbits. The proposed rabbitry solution is the most popular, ideal for keeping small livestock. In the constructed cage you can equip a house for a decorative rabbit.
Creating a two-tier structure will require more effort, patience and skills, but this model is very convenient, as it allows you to use less space while accommodating a large number of animals.
When choosing a drawing for a future building, you should take into account the possibility of placing a rabbit house in a cage in the future.
Dimensions of the rabbitry Source skachat-kartinki.ru
Nursery construction
The first thing you should pay attention to when making nurseries is the design. The parameters and quality of the final construction will depend on the chosen design.
Nursery construction
There are several types of rabbit hutches:
- single-tier;
- two-tier;
- three-tier;
- multi-tiered;
- monolithic;
- portable;
- shads;
- nurseries in Zolotukhin, Tsvetkov, Rabbitax.
Nurseries differ in materials (wood, plywood, metal profiles) and the breed of pets. In the latter case, rabbitries are allocated for female rabbits and rabbits, for decorative breeds, dwarfs, etc.
Nurseries are designed for warm and cold seasons; for this purpose, special seals are installed in them, and the buildings are closed from precipitation.
Single-tier rabbit cage, first steps - frame
If you have a drawing and the desire to build cages for breeding rabbits, it will not be at all difficult.
First, a frame is formed:
- Wooden beams are prepared in advance and treated with an antiseptic composition in order to subsequently avoid rotting of the material and the appearance of harmful microorganisms in it.
- The timber is used to assemble the frame of the future cage. 4 beams of 1.5 meters each, 4 – 55 cm and 4 – 70 cm are cut from the workpiece. You can replace 4 beams of 55 cm with 2 beams of 55 cm and 2 beams of 35 cm. Smaller pieces will work on the back wall, where the queen's nest will subsequently be identified.
- Short bars are connected to one and a half meter bars. The result is two equal figures. From the same bars for the front and back of the cage you will get a rectangle. If two different pairs were initially taken, we get a trapezoid.
- Using 70 cm blanks, these two rectangles must be connected to each other.
The result is a frame in the form of a large box.
Assembly
Any construction project, regardless of size and scale, begins with the assembly of the frame - our case is no exception. First you need to assemble a frame from previously prepared beams. The distance between the legs on which the base will be installed is directly proportional to the width of the future housing for the eared ones, so it all depends on your own ambitions. But we recommend making the cage at least 70cm wide.
For the floor we use the previously mentioned galvanized mesh. It contributes to better disposal of waste and excrement of future residents. Galvanization ensures the absence of corrosive deposits during operation, and this, in turn, has a detrimental effect on the health of pets.
After this, you can begin to strengthen the rear wall of the cage. When installing the rear wall, to better secure the floor and hide the pointed ends, they are “grabbed” by the very base of the rear part of the structure.
This version of the cage provides for a nesting compartment, the floor of which will be made of base material rather than mesh. Both nesting compartments are made of belt loops, and an arched hole is cut into them to allow passage. The lid is placed on top and secured with screws or nails. At this point the nesting compartment is ready.
After installing and organizing the nest, it is necessary to divide the entire cage into 2 parts. This is done by installing a cross beam. After dividing into sections, you can begin making feeders. In our case, they will be bunkers.
Next, you need to properly strengthen the bottom, which at this stage is only slightly caught by the back wall. To do this, we turn the cage over and strengthen the mesh using the selected tool (thin slats and nails).
The base is ready and now it’s time to start making a feeding bin, strictly observing the dimensions and distance between the knocked down beams. Note that the bunker should not “walk” freely along the wall. After this, we check the feeder for functionality - the main thing is that the feed does not get stuck in the hopper itself.
In order to create the most versatile cage for rabbits, you can make special feeders for coarse feed. It is done in the middle of the cage itself, behind the main bunker feeder. It can be done using thin rods or a mesh, the cross-section of which will exceed the same parameter as that used for the floor. For better convenience, you can make a sliding door for feeding by equipping the top of the cage with grooves along which a board equipped with a handle, which can be made from the remains of a timber, will slide.
Installation of the floor in the rabbitry
You can use different materials to install the floor.
Floor in the rabbitry Source ytimg.com
Metal profile floor
This option is characterized by a long service life and ease of maintenance. The disadvantage of this design is the difficulty in its manufacture. Firstly, you will have to make such a grid yourself. Secondly, special attention to the cells, which must be very small so that the rabbits’ legs do not fall through.
Fine mesh floor
Fine mesh is easy to install and easy to maintain afterwards. But it may break. The design and long service life are no different. Typically, the service life is directly related to the quality of welding.
Wood slatted floor
Wooden slats – environmental friendliness and affordability in one. They are easy to install. But if the material is not initially processed properly, then rabbits can get splinters in their paws. Another drawback is the short service life. Soon such a floor will begin to rot and will need to be replaced.
You can combine these options.
Important! It is not advisable to use a non-mesh floor in the main compartment. This is due to the fact that waste products will penetrate through the holes and accumulate in the pan.
Why is the popularity of rabbit farming declining?
There are several reasons for this phenomenon, the most important ones should be mentioned.
- Increasing the well-being of our compatriots. You need to understand that previously, rabbits were bred in villages or dachas not out of great love for animal husbandry, but in order to improve the standard of living. Rabbit farmers, in addition to meat, brought income from skins, from which winter hats, fur coats, etc. were massively sewn. Today no one wears such hats, so handing over skins is a big problem. Currently, young people prefer to buy meat in a store rather than breed animals themselves.
Breeding rabbits requires not only knowledge, but also a lot of work
- Rabbit breeding is one of the most risky activities; in the event of an epidemic, the entire livestock dies within a day. Meat is unsuitable for consumption and must be disposed of at special landfills. A veterinarian must live nearby, carry out periodic inspections of the livestock in a timely manner and carry out all vaccinations. If there is a veterinary hospital only in the regional center, then it is better not to breed rabbits.
Rabbits are too susceptible to disease
We will not list other factors hindering the massive development of rabbit breeding, but there are quite a few of them. But even those mentioned should force potential rabbit breeders to carefully weigh their options against practical conditions.
Rabbit cage sizes
Roof construction
To decorate the roof you will need a sheet of plywood and hinges used on doors or cabinets. First, the hinges are screwed to one of the upper frame beams. A sheet of plywood is laid on them, which fits tightly, otherwise drafts will appear.
In the place where the mesh connects to the boards, a board is installed that will go from floor to ceiling, and from wall to wall. A small hole should be made in it in advance, which will allow the animals to move freely.
The finished structure must be supported by supports. A pallet is formed at the bottom.
Ready-made cage for rabbits on supports Source unidoski.ru
You can make cages for rabbits from a profile pipe.
Making your own rabbit cage using the Mikhailov method
Rabbit cages built using the Mikhailov method are multi-tiered mini-farms. The structure consists of several tiers, each of which serves as the basis for the next. The bottom is made of slatted lattice, which ensures that manure falls into a special container. The walking compartment is equipped with feeders and drinking bowls. Food and water are replenished as needed.
The main advantage of mini-farms is minimal human participation in the production process, which ensures the absence of stress for shy animals.
Cages for rabbits Zolotukhina
This structure increases the efficiency of raising rabbits. The structure consists of three tiers. The higher ones are shifted relative to the lower ones by the width of the grid. There are two cells on each floor. The feeder is a tilting tray, which makes it possible to add food without opening the door.
This design is very popular.
Feeders, drinkers and hay
It is important not only to have an idea of how to build a rabbit cage, but also how to properly equip it from the inside. Feeder, drinkers and hay are the constant attributes that must be present.
When equipping a drinking bowl, it is important to take into account the fact that it can be easily removed, since it will have to be washed frequently and the water in it changed. It is best to use trays made of metal strip for this purpose. Attach them to the cage door or next to it on the wall.
One of the most optimal options for making a drinking bowl is using sewer pipes. A scrap of this material with a diameter of 10 cm and a height of 8-10 cm is used to decorate the “cup holder”. A trimmed 2-liter plastic bottle fits into this ring. Cut it so that it is on the same level as the “cup holder”, leaving only a strip 2-3 cm wide and 5-7 cm long.
House for young animals
A cage for a domestic rabbit should accommodate from 10 to 20 animals at a time. The walls need to be made 30-40 cm high. The offspring can be kept there for up to 5 months. The cage should be raised from the floor surface by 70-80 centimeters.
You need to put a net on the floor to prevent kids from chewing on the wood. You can make the entire floor from mesh, but such a house will have to be placed in a warm room. With a mesh floor, the house will be constantly ventilated, and feces will not accumulate there, which will help protect animals from various diseases.
Hay can be used for insulation. The layer thickness should be from 15 to 20 millimeters. Artificial bedding will have a bad effect on the young animals, and therefore they may get sick. It's worth giving up.
Useful tips for building a rabbitry
Not all novice craftsmen know how to make a cage for rabbits, taking into account all the nuances, so mistakes are possible when making the structure.
For example, if you save material, this will lead to crowding, which negatively affects the health and reproduction of rabbits.
The uterine or nesting compartment must be made stationary. Any nooks and crannies can provoke the death of baby rabbits as a result of a stampede, as the female becomes frightened.
But when depositing young animals, it is recommended to use a cage with a stationary nook for rabbits. A small loophole in a compartment measuring 12x12 cm will allow the rabbits to get through there, while the female will not be able to get through and will not be able to be with them all the time. In the question of how to make rabbit cages, this option allows you to reduce the stress of the procedure for weaning offspring from a female rabbit.
Inside
Depending on the breed of rabbits, the contents of the house may vary. When young animals or rabbits are kept inside, queen cells and nest boxes must be installed there. Sometimes they make an exit from the cage into the enclosure. Feeders for branches or hay can also be constructed.
Drinking bowls
These animals require that they always have clean water in their enclosure. Therefore, the watering hole must be installed at a height of 4-5 centimeters from the floor so that dirt does not get there.
You also need to choose the right material for the drinking bowl. It should not be made of plastic, as rabbits will quickly chew through it. There is no need to install metal watering holes. Currently, there are certain designs of drinking bowls that will be safe for animals and provide them with clean water.
See also: How to make a queen cell for rabbits with your own hands?
Feeders
This design must be planned at the stage of drawing up the design of the house. An important condition for constructing a feeder is its size and installation.
Door installation
The last step in making the cage will be installing the mesh doors. Each of them must open and close freely. To prevent an authorized opening and subsequent escape of one of your pets, make a special rotary latch or equip them with a hook and loop. The house is ready to receive its first guests.
Step-by-step photographs for making a universal type cage are below. To see comments (marks), hover over the picture itself.
